If you are looking for something more casual that, for instance, you can use to access your home computer when traveling then you may want to consider Aeroadmin. Or weigh your best option from our list of the best remote access software. But back to Dameware. SolarWinds have really tried to make this software easy to use even going ahead to base the user interface on the Microsoft Management Console. However, there is just a tiny problem. The Dameware Remote Support can only be installed on Windows-based system. The good news is that you can still use it to remotely access Mac and Linux based devices. The bad news is that Windows and Mac are not friends. You will require a special type of connection called VNC to be able to access Mac computers using Dameware. So in this post, we will be looking at how to set up the VNC server on the Mac computer and the set of processes you need to take on the Dameware client in order to successfully initiate a remote connection.
How to Setup a VNC server on the Mac OS X
The Mac computer is configured not to accept remote connection requests by default. And it’s easy to understand why. Hackers can easily take advantage and initiate connections which you may unknowingly accept and thus end up giving them full control of your PC. These are the steps to follow in order to ensure that the Dameware connection requests are not blocked out by the remote Mac machine.
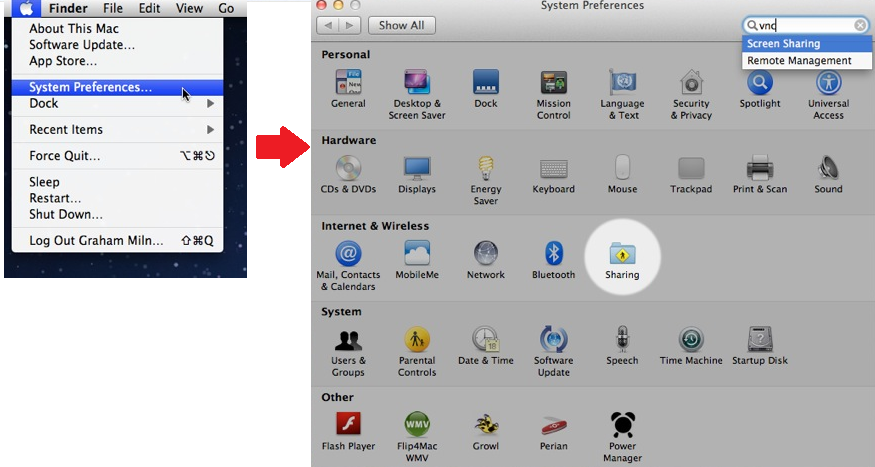
- Navigate to the System Preferences of the target MacBook and then select the Sharing option.
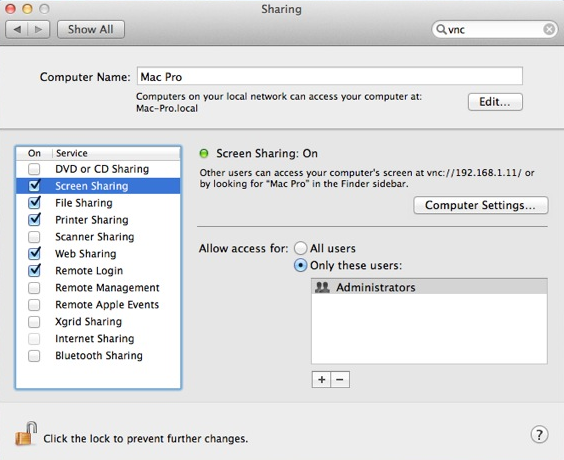
- You should now be able to see a number of services listed on the left pane of the Sharing dialogue box. Look for Screen Sharing and click on the checkbox beside it. Also, if not already checked, select the File sharing, Printer Sharing, and Web Sharing options.
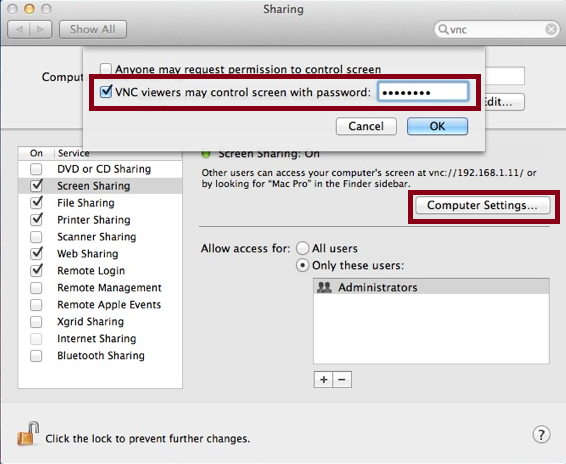
- Click on Computer Settings and select the second option labeled VNC viewers may control the screen with password. Go ahead and set a password of your choice. This password will be used to authenticate client computers before they can gain remote access to your Mac device.
- Define who has the permission to access your Mac’s screen just below the Computer Settings. You can either choose to allow all users or take a selective approach and add specific users or groups. The plus(+) button adds new users while the minus (-) button deletes users. Note that the above process may differ based on the version of Mac you are using. For example, if you are using version 10.4 or 10.6, here is how you could go about it.
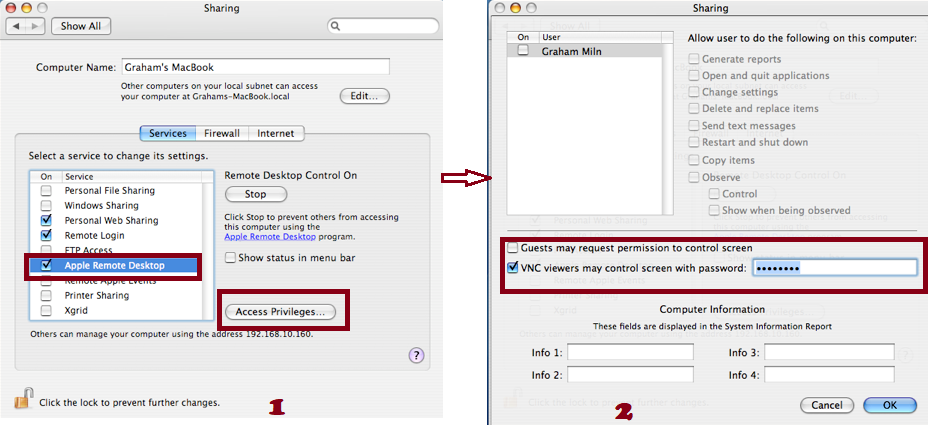
How to Configure the VNC server on Mac OS X 10.4 and 10.6
Go to System Preferences and again find the Sharing option and open it. But now instead of Screen sharing, look for Apple Remote Desktop, check the box beside it and then click on Start. To set a password for the VNC connections, go to Access Privileges and you will see the viewers may control the screen with password option. Proceed to create your password and then click Ok. So now that the VNC server is up and running you can now connect to the Mac, right? Not quite yet. There is just one more step you need to complete. Checking to see whether the Mac built-in firewall allows screen sharing. Although, this should not be a problem since in most cases the firewall will be disabled. The firewall will only be active if you are using a modem to connect to the internet. But if you are using a router then the computer uses the hardware’s firewall.
How to Check If Your Mac Firewall Accepts Remote connections
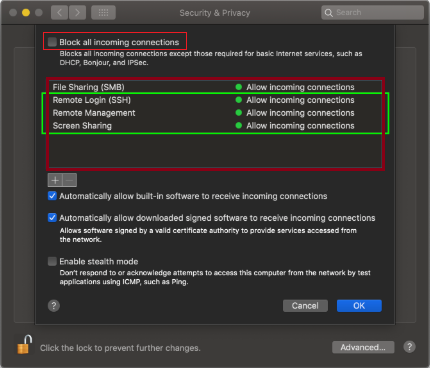
Go to System Preferences, navigate to Security and Privacy and then click on the Firewall option. Next, click on the lock icon on the preference pane so that you can access the firewall settings. Once you are in, click on Firewall options and ensure that Screen sharing, Remote management, and Remote login are on the list of allowed services. There is a box labeled Block all incoming connections. Make sure it is unchecked. Something else I should mention is that the standard VNC port Mac computers use to listen to incoming requests is port 5900. Which, unfortunately, is not the port used by Dameware to send the remote connections. So before you can remotely access the Mac computer you also need to open the specific ports used by Dameware. The port forwarding process will vary depending on the type of router but we created a port configuration guide that should help you open the Dameware ports on just about any router. And we are done with the hard part. What remains now is to log in to your Dameware Client software, open the Dameware Mini Remote Control (DMRC) tool and send a connection request to the specific Mac computer.
How to Connect to Mac Computers using DMRC
Connecting to Mac Computers that are Within Your Internal Network
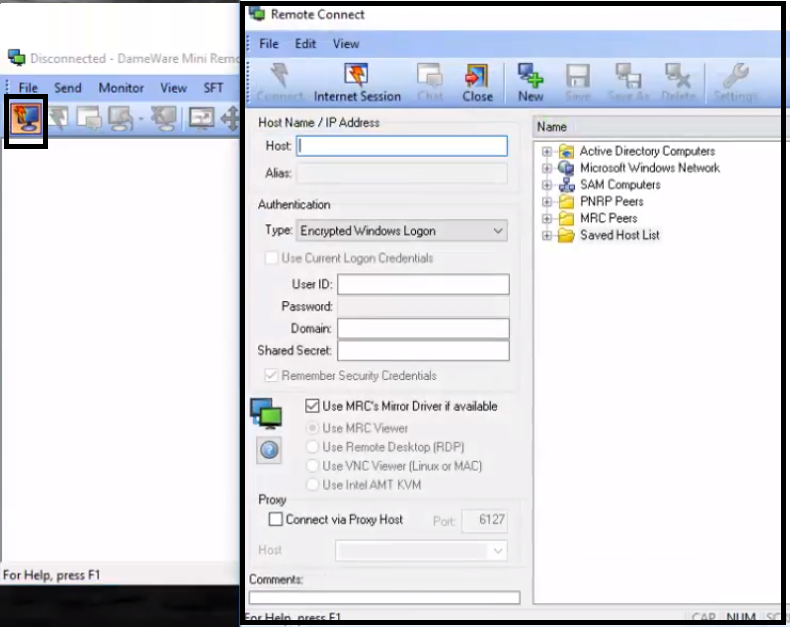
Launch the Dameware Mini Remote Control tool and open the Remote connect dialogue box by clicking the dedicated icon on the DMRC taskbar.
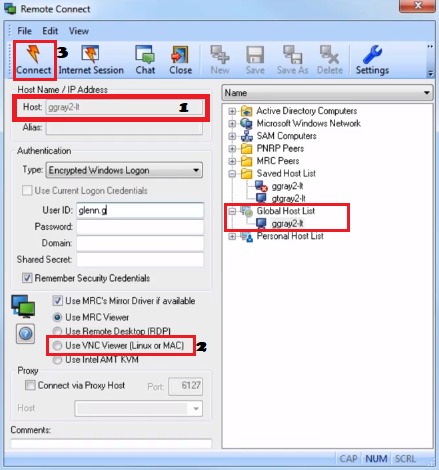
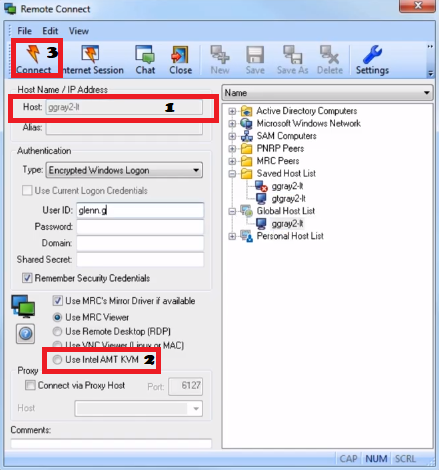
Input the Mac’s IP address on the connection dialog box. Or search for it in the devices listed on the right side of the box. And then, this step is important, select the Use VNC Viewer option and finally click on the Connect Button.
Once connected you can proceed with the remote troubleshooting and remediation processes. The Dameware Mini Remote Control tool allows you to chat with end-users within the application, transfer files, capture screenshots of the remote session and a bunch of other great features.
Connecting to Mac Computers that are Outside Your Internal Network
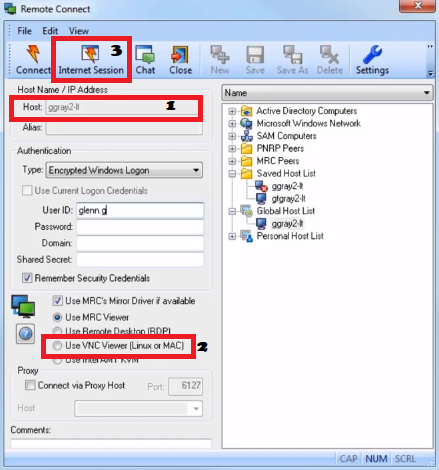
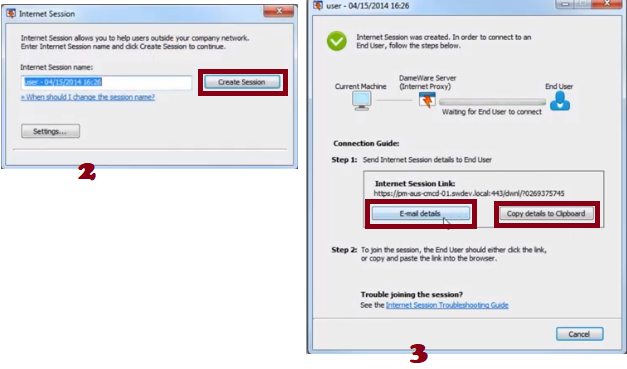
For this task, the process remains basically the same as the first process up until the last part. Open the Mini Remote Control tool, enter the IP address of the Mac computer you want to access, check VNC type of connection but now instead of clicking the Connect button, you select the option next to it labeled Internet Session. Dameware will then pop up a Dialog box prompting you to create the session. By default, Dameware will automatically create a session name based on the name of the host machine and time that the session was created. Nevertheless, you are allowed to create your own custom name which is more memorable for you. Once you create the session, then another Dialog box will appear prompting you to send the details to the remote computer. If you have an email client installed on your computer then simply go for the Email Details option. Otherwise, copy the details to the clipboard and send them via any other mode you prefer. The remote machine will receive the connection request link and once they accept it then you will have access to their computer.
How to Connect to Out OF Band Mac computers using Intel AMT KVM
Out of band computers means machines that have been turned off, are in hibernation mode, have crashed or had a hard disk failure that’s preventing them from booting successfully. With Dameware you can still connect to these devices and manage them by leveraging the Intel Active Management Technology (AMT) which comes integrated into the Intel chips. You would also be able to access the computer’s BIOS or EFI in the case of Macbooks and even install an operating system remotely. To do this, open the Dameware Mini Remote Control, enter the IP Address of the Mac computer and then use the Intel AMT KVM connection type to send the connection request. Unfortunately, there is not enough documentation on the use of Intel AMT to control Mac computers so there is not much I can tell you concerning it. And that sums up all the configuration processes involved before you can remotely control your Mac computer using Dameware Remote Support.
Dameware Remote Support Review – A Software Created for System Admins and MSPsDameware Remote Support vs TeamViewerHow to Configure and Securely Connect Remotely on a Windows Server using Radmin?How to Turn on your PC Remotely using Wake-on-Lan