Uninstalling one version of VLC media player and installing another might not work as one expects due to issues in uninstalling it. In Windows, the program might not uninstall properly if some files are corrupted, lost or removed. And the version being installed afterwards won’t function unless the previous one is properly uninstalled. Here, we will explain how to uninstall the latest version of VLC, that is, 2.2.4 properly and provide a reliable link to download previous version from.
Uninstall VLC from Windows properly and reinstall older version
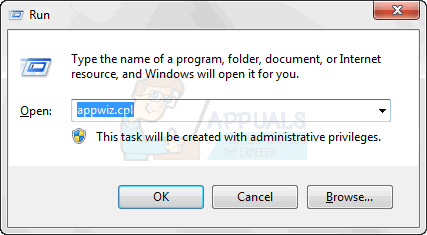
Click Start and Type Control Panel, choose Control Panel from the search results displayed. Once you are in Control Panel, click on Uninstall a Program under the heading of Programs. The Programs section would be at the bottom of the list on the left or Hold the Windows Key and Press R and type appwiz.cpl in the run dialog.
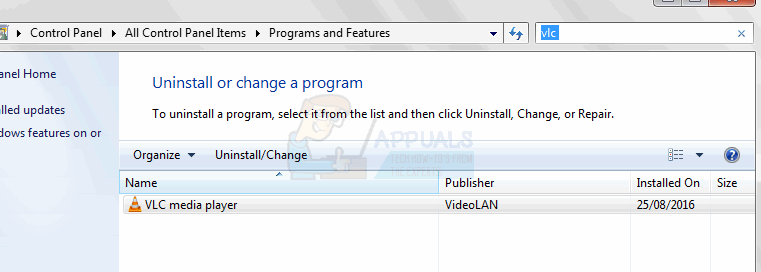
Next, search for VLC Media Player in the list that opens up. After you find it, select it and click on Uninstall/Remove. This option would be on the top of the list, next to Organize. Click on the Next button in the dialog that opens. Now you are standing at the most significant part of uninstalling VLC; do not miss this. The next dialog box that opens will have an option Delete preferences and cache. Make sure you check it and then click uninstall. Once this is done, click the finish button.
Doing this will uninstall the VLC media player on your computer system successfully. Next, to get any of the older versions, visit here. Download the older version of the VLC media player and launch the setup by double clicking on it. Follow the on-screen instructions to install the VLC media player on your computer system.
Fix: Cannot Open File for Writing’ with VLC Media PlayerHow To Fix VLC Media Player Crashes when Playing .MKV FilesHow to Loop or Repeatedly Play a Video using VLC Player?How to Convert Videos Using VLC Media Player