How to Fix dns_probe_finished_bad_config on Windows 7, 8 and 10
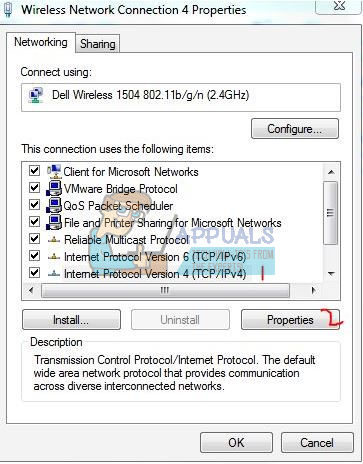
By default, your computer is set to use the DNS configured in your router or modem which is Internet Providers DNS unless it has been changed. I always recommend using public dns servers, which you should see in this guide as they are most active and have a 99% uptime. If you don’t understand, don’t worry, just follow the steps below. Hold Windows key and press R In the run dialog, type cmd and click OK When the Black Command Prompt opens, type the following in it and Hit Enter. This will flush dns cache. Which is sometimes, the cause when there is a change in the DNS and the system is looking up its local cache to take you to the websites. Once this is done, Hold Windows key and press R again. This time, type ncpa.cpl and Click OK. You will be taken to the network connections. What we need to do here, is update your DNS settings. Identify your network adapter, which is connected and right click it, then choose Properties. Then, from the properties pane, click “Internet Protocol Version 4 (TCP/IPv4)” once so that it becomes highlighted in grey and select Properties again. Put check on use the following dns server addresses and enter the following for Preferred DNS Server and Alternate DNS Server Click OK and close the rest of the windows.
Check the Google Chrome Version and the Last Time Chrome UpdatedGoogle Rolls Out New Google Assistant “Snapshot”: A Revamped Version of Google…Fix: ERR_CONNECTION_TIMED_OUT on Google ChromeHow to Fix Server DNS address could not be found on Google Chrome